Industrial Prototype Design
Every successful project reaches a stage where it is time to mass produce it. However, things here are not so easy. You first need to make an industrial prototype and even before that, design it. You are going to ask me. Hey, I’ve already designed my product and managed to make a prototype of it, what else is there to design? Well, industrial product design prototype, or as it is often called, design for manufacturability is a complex and time-consuming process but it is definitely worth your time if you want to gain more profit for your business.
Table of Contents
What Is an Industrial Prototype
Among some designers exists a misconception that once the product has been designed and a first prototype has been created, they can relax and leave it all to the manufacturer. This is not so. Making a good design and Asking for a prototype is a great feat. Unfortunately, that doesn’t mean that manufacturing it on a grand scale will be effective and gain you profit. Sure, it may gain you some, but you could get so much more.
The point is that prototyping is not as efficient as mass production. The technology used to manufacture a simple prototype is usually aimed at minimizing capital investments, avoiding the purchase of new tools and fixtures and using the simplest of blanks so that you can make one part as fast as possible.
Mass production is completely opposite of that. You’d rather buy another machine tool or a more effective fixture and tool, all for the sake of lowering the time and cost of manufacturing a single part.
Basically, the industrial prototype is the result of technology optimization tests. It is the hardest and the most expensive stage of getting the product into the market. So, wouldn’t it be great if you could change the design just a little bit so that you wouldn’t have to buy an extra million dollar machine tool?
What Is Design for Manufacturability?
Design for Manufacturability (DFM) is an engineering practice that strives to make the product easy for manufacturing while keeping its key features intact. This concept differs from discipline to discipline. We are going to talk about the general part and assembly manufacturing. The one that involves machining, injection molding, and other general manufacturing techniques. There will be no circuit, electric or power engineering clues here, sorry.
So, the key objective of DFM is to lower the cost and time of manufacturing at the stage, where nothing has been purchased yet and no technology has been set in stone? This stage is the cheapest to make changes and it is the one where the most drastic measures can be taken.
Blank Manufacturing Method and Design
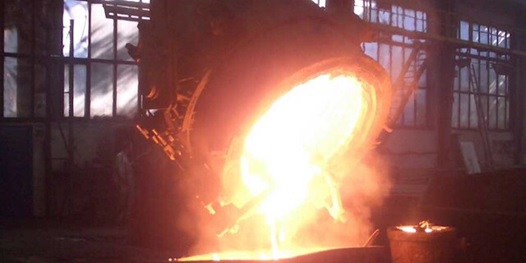
One of the main things that separate mass-production from single product manufacturing is material efficiency. When you have one part, you can afford to lose some raw steel to avoid complex casting or pressing methods that take a lot of time to design and set up. However, when you start losing the same amount of material on every part among thousands of manufactured goods, you really start to feel it.
1. Casting and Injection Molding.
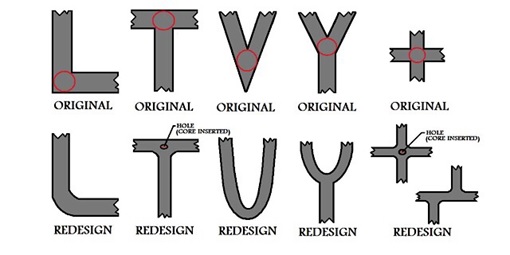
I’ve decided to unite the tips for these methods because they are quite similar in their performance. The part is usually cast in two halves, made of sand, metal etc. Therefore, in order to make it easier to get the part out, it is advisable to make small slopes in part vertical walls. You should also avoid thickening of the walls, as stated in the picture below because it will lead to cavities. Any non-vertical holes and grooves will be harder to manufacture as well.
2. Pressing.
Hot pressing is a process that yields blanks with great properties, however, you may need to heat treat the parts afterward. The blank will need slopes as well and horizontal grooves and holes cannot be created at all.
3. Welded Blanks.
These are the easiest to manufacture as they are most often a combination of standard blank parts. However, you need to leave more allowance as those methods are not precise and you will need to check welding seams for cracks and cavities.
Some Machining Tips
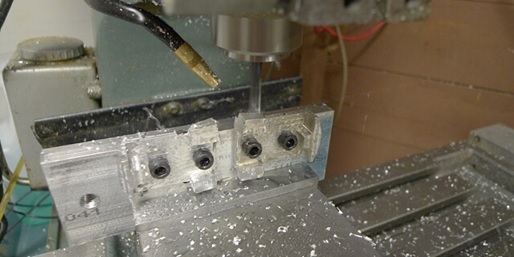
CNC machining is driven by the machining time. The faster you make a part, the cheaper it will be. So, the majority of the techniques here is aimed at decreasing machining time.
-
The Less Flips The Better.
About 70% of the manufacturing time is eaten by secondary operations, such as setting up and fixing the part, setting the zero point and changing fixtures. For example, it may take you half an hour to set up the blank right, whereas machining the blank may take only 4 minutes. This is why you should try to design a part that can be manufactured after one flip. It is impossible sometimes, but minimizing setups is the best solution.
-
Check Some Problematic Elements.
Machining has some restrictions and problematic elements. You can check them out here. Following those few tips will significantly decrease the machining time of any metal, not just aluminum.
Assembly Optimizing
-
Design Symmetrical Parts.
In mass production, the one assembling your product won’t be someone who knows all of its nooks and crannies like you. It will just be a simple worker, whose main worry at that moment maybe lunch or a football match in the evening. This is why it is better to make a part that will fit your assembly either way.
-
Design Completely Asymmetrical Parts.
This tip may seem strange at first but it is actually very similar to the previous one. Let’s take our easy-going worker again. Making a part that is completely different will prevent him from getting confused about which side to install. If the part is just a little bit asymmetrical, then it’s harder to discern.
-
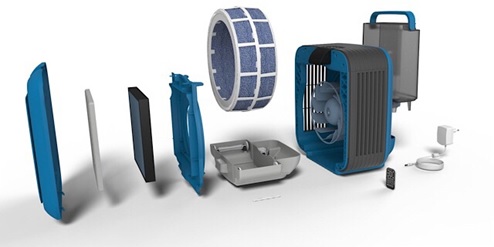
Divide Your Design Into A Number Of Sub-Assemblies.
It is always more productive to do something in parallel rather than consecutively, right? Well, this is why it’s better to divide your product into a number of independent sub-assemblies and unite them all in the final operation. One thing to note, though, those sub-assemblies must not disassemble when carried or moved, otherwise, you are bound to lose some parts.
-
Try To Use Similar Fittings.
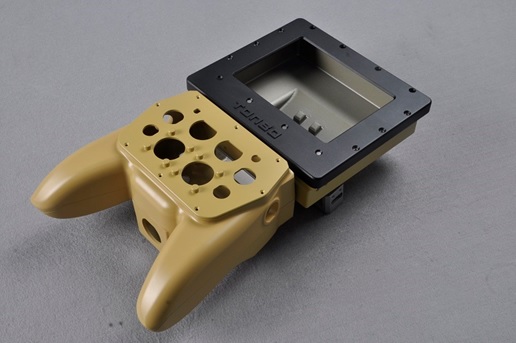
If your product needs to be screwed together by using bolts, It’s better to make them all M4 bolts, or M5. So that you don’t have to buy tens of different sizes. It will be easier, there will be no confusion and You’ll always have enough of the fittings.
These tips are sure to help you prepare your design for mass production. Just be sure to remember the rule of 10 in the procedure of industrial prototype design. Each consecutive product lifecycle stage will require 10 more times in costs and time to fix if mistakes had been made.
Related posts
Sidebar
Recent Posts
An Inside Look Of Paraulogic
Introduction Welcome to the exciting world of Paraulogic! Are you ready to dive into a linguistic adventure and put your…
Empowering Artists with Cryptocurrency: A Guide to Selling Art Using NFTs
In the ever-evolving landscape of the art world, artists are constantly seeking innovative ways to showcase and monetize their creations….

